


These colorful, no-bake Fruity Pebbles Treats are the perfect way to satisfy your sweet tooth! Make a batch to share or enjoy them all by yourself — they’re so delicious, they won’t last long!

Would you like to save this?
DISCLAIMER
*This post may contain affiliate links, meaning Feast + West may receive commissions for purchases made through those links — at no cost to you. All opinions are our own. Please read our full disclosure for more information.
About this Fruity Pebbles Treats recipe
Summer is great for so many things — cookouts, days by the pool, s’mores… One thing that’s not great? Adding to the heat anytime you’re craving a sweet treat!
Sure, chocolate chip marshmallow cookies are gooey and delicious, but turning on the oven at any point during summer’s hot days is a steep price to pay. Luckily, there are plenty of tasty no-bake recipes that are the perfect compromise.
Fruity Pebbles Treats are colorful and fun, and taste just like you remember from childhood mornings. Thanks to the marshmallows, you even get a bit of that cereal-and-milk taste that is delicious no matter how old you are.
I think my favorite thing is that no-bake recipes still look — and taste — good enough to share. Set out a plate at your next gathering and watch how quickly they disappear!
More no-bake dessert recipes: No-Bake S’mores Cookies • Chocolate Peanut Butter No-Bake Cookies • No-Bake S’mores Avalanche Cookies

Why you’ll love this recipe
- No oven required! This is the perfect dessert for hot summer days.
- Perfect for all ages. Nobody will be able to resist this treat, from kids to adults.
- It’s a simple recipe to follow. With just a few ingredients and a handful of steps you’ll be ready to enjoy your Fruity Pebbles bars.

Tools & equipment
Just like the recipe itself, the list of tools for this is pretty straightforward.
You’ll need a saucepan, rubber spatula * and a pan to shape your bars. Whatever you have in your kitchen is fine, whether its metal or glass. You could even use a fun shape to fit any occasion.
The texture of your treats depends on the size of your pan. A 9×13-inch pan will yield 18 bars, while a 9×9-inch pan will give you fewer squares that are thicker and chewier.
Parchment paper * is optional, but it makes removing your cereal treats from the pan much easier! Cooking spray would work too, just make sure you get your pan fully covered.
baking essentials
 Buy Now →
  Buy Now →
 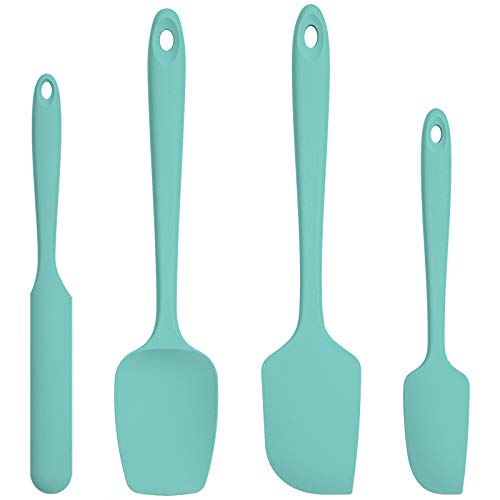 Buy Now →
 *

Ingredients
👇 For full measurements and step-by-step instructions, scroll down to the printable recipe card. It’s all there waiting for you!
As you can guess from the name, Fruity Pebbles cereal is what gives this dessert its colorful appearance and fruity flavor. If you don’t have any in the pantry, any rice cereal will do! You could use a chocolate variety like cocoa pebbles for a more decadent dessert or try rice krispies (elevate them with this bourbon rice krispies recipe).
Mini marshmallows melt more evenly than their larger counterparts. In a pinch you can use any, including jumbo marshmallows, but I tend to keep the mini variety on-hand for recipes like this. If you’re feeling adventurous, use fruity marshmallows for even more sweet fruit flavor!
When it comes to the rest of the ingredient list, my rule of thumb about ingredient quality still stands. Use the highest quality ingredients you can afford for the best results!

Instructions
Now it’s time to create your Fruity Pebbles Treats!


First, melt your butter over low heat. Once it’s completely melted, add in your marshmallows (reserve some for later).


Once your marshmallows have melted and are smooth with your butter, pour in your vanilla extract *. Next, remove your mixture from heat and fold in your cereal, ensuring everything is evenly coated.


Stir in the last of your marshmallows until everything is well mixed. Line your pan with parchment paper * and gently press in your mixture so it sticks together. Let them chill, then cut them apart and enjoy!
Tips & tricks
- Melt the marshmallows low and slow, and take them off the heat as soon as they’re smooth. If they get too hot, your bars can turn out tough.
- Use a rubber spatula * or clean hands to press the mixture into the pan. Press gently — firm enough to hold together but not so tight they turn rock-solid.

Drink pairings
A treat this colorful and flavorful deserves a drink to compliment it! Try something like strawberry mocktail, Shirley temple or cherry mocktail to amp up the fruity flavors with a drink suitable for all ages.
For a grown-up get-together, play up the cereal theme with a batch of milk punch or cinnamon toast crunch shots. If you’d rather have something to cut the sweetness, try something with bold boozy flavor like a classic old-fashioned.

FAQ
Yes, and you totally should! The fruity cereal adds color and flavor to the traditional dessert that is perfect for summer fun.
If you overcook your marshmallows or pack your treats too tightly into your pan, you can end up with tough treats.
More summer recipes
Leave a comment or tap the ★★★★★ below to leave a rating — it helps others and supports our work. We love hearing how it turned out!

Fruity Pebbles Treats
ingredients
- 6 tablespoons salted butter
- 9 cups mini marshmallows divided (approximately 16 ounces)
- 1 teaspoon vanilla extract
- 3 cups Fruity Pebbles cereal
- 3 cups Rice Krispies cereal
instructions
- Melt 4 tablespoons unsalted butter in a large nonstick skillet over low heat. Add 8 cups mini marshmallows, reserving 1 cup for later. Stir until smooth, about 3 to 4 minutes, then mix in vanilla extract *.
- Remove from heat. Fold in 3 cups Rice Krispies and 3 cups Fruity Pebbles until evenly coated. Stir in the reserved cup of mini marshmallows, saving a handful to press on top if you like.
- Line a 9×13 or 9×9 pan with parchment. Gently press the mixture into an even layer. Top with remaining marshmallows and press lightly so they stick.
- Chill for 1 hour, then slice into squares and serve.
notes
Save this recipe for later
recommended products
As an Amazon Associate and member of other affiliate programs, I earn from qualifying purchases.


Leave a Reply