


If you’ve ever wondered how to make rock candy, now is the time to learn! This nostalgic childhood treat is easy to make, fun to eat and doubles as a science project. Just a few simple ingredients and a little patience to wait and let the magic happen.

Would you like to save this?
DISCLAIMER
*This post may contain affiliate links, meaning Feast + West may receive commissions for purchases made through those links — at no cost to you. All opinions are our own. Please read our full disclosure for more information.
Rock Candy recipe
Growing up, my siblings and I treasured the old-fashioned candy room at the Mast General Store in North Carolina.
Every time we visited, my parents would let us each grab a bag and fill it with our favorites: lemonheads, fireballs, candy dots, black licorice sticks, Mary Janes, candy necklaces, caramels and rock candy.
But rock candy sticks always fascinated me! What kid wouldn’t be obsessed with edible gems on a stick? One summer, I got my answer during a fun science experiment as a summer project! I finally knew the secret to those beautiful rock candy crystals.
Even now, rock candy is still something I think is so fun. If there’s a drink with a rock candy garnish at a fancy cocktail bar, I’ll still order it! It conjures up that nostalgic feeling, the same way these cake push pops or moon pie ice cream do for me.
If you love rock candy swizzle sticks as much as me, now you can make your own with this super fun recipe. It’s cool to be a kid again!
More cocktail garnish recipes: Berry Ice Cubes • Margarita Salt • Sugared Cranberries

Why you’ll love this recipe
You’ll love this recipe, for a few reasons:
- Need something to keep your kids entertained during the summer? Take a page from my dad’s book and make DIY rock candy! It’s candy and a science experiment in one — who would say no to that!
- Not only does rock candy taste great, but it looks beautiful. It a great easy recipe to themed for any holiday. Make different colors to match the holiday spirit!
- Make your own rock candy to give out as gifts! The kids would love to hand it out to school and it’d also be so much fun to hand out this sugar candy for Halloween or at the holidays.
What is rock candy?
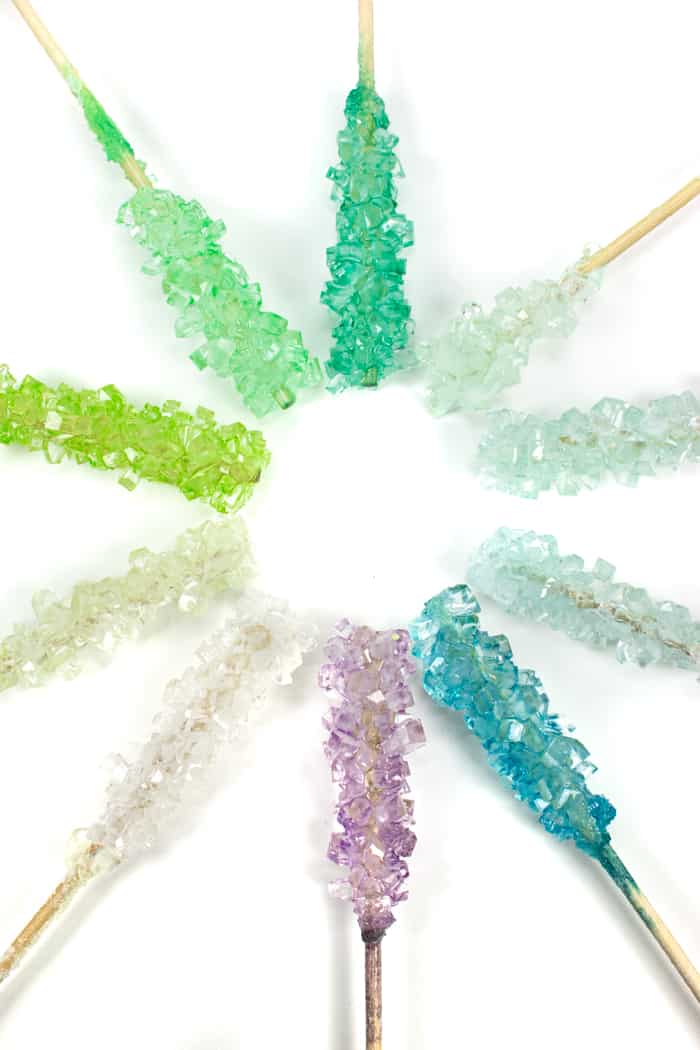
Rock candy is essentially just sugar molecules grown on wooden sticks or cotton string to form a pretty piece of candy. This sweet treat can be made out of any type of sugar, as long as you use the proper methods to make it!
Swizzle sticks are made by letting a supersaturated sugar solution sit for a while and form large sugar crystals. This crystallization process makes the large shiny chunks of sugary goodness that are just irresistible!
Rock candy is often sold in various colors, but it can also be made to look natural. It will be transparent with granulated sugar, and with cane sugar or brown sugar, it have be a golden brown hue.
Materials & ingredients
You’ll need to gather a few simple ingredients and supplies to make rock candy:
👇 For full measurements and step-by-step instructions, scroll down to the printable recipe card. It’s all there waiting for you!
- 8 oz. mason jars, or larger: Drinking glasses will work too, if you have a few spares on hand. But make sure you don’t use anything smaller than 8 oz.
- food-safe, wooden swizzle sticks OR string : It is very important to buy something that is food grade. After all, you want to be able to eat your tasty rock sugar. You can also look for lollipop sticks!
- clothespins: If you are using string, grab a pencil or a wooden spoon with a thin handle. You’ll need to use that to tie the string on something and hold it in place.
- a saucepan
- sugar: I recommend using pure granulated sugar.
- water: For best results (and best flavor), use a purified or filtered water.
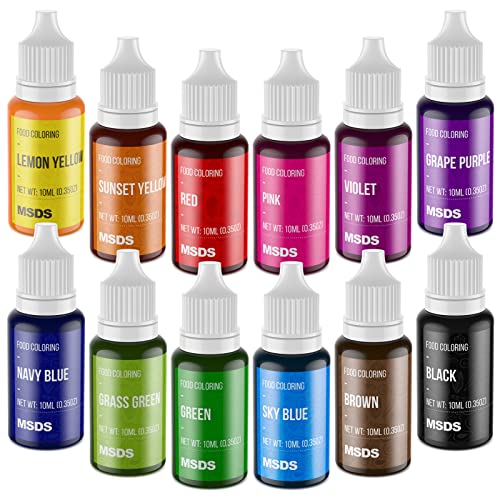
- liquid food coloring:Totally optional, but man does it make this homemade rock candy recipe extra exciting!

How to make rock candy
Rock candy is surprisingly simple to make in your own kitchen. It only takes 30 minutes to prepare, and then about a week or two for the crystal growth to complete.
SAFETY NOTE: If you’re making this recipe with kiddos, please make sure to supervise as it will require making a very hot liquid. No burned little fingers on your watch, okay?


First, cook the granulated sugar and water together to make a super thick simple syrup.
Make sure you follow the printable instructions below, because this is unlike any simple syrup you’ve ever made.
At this step, feel free to add a few drops of food coloring to the mixture if you’d like. You can use any color!
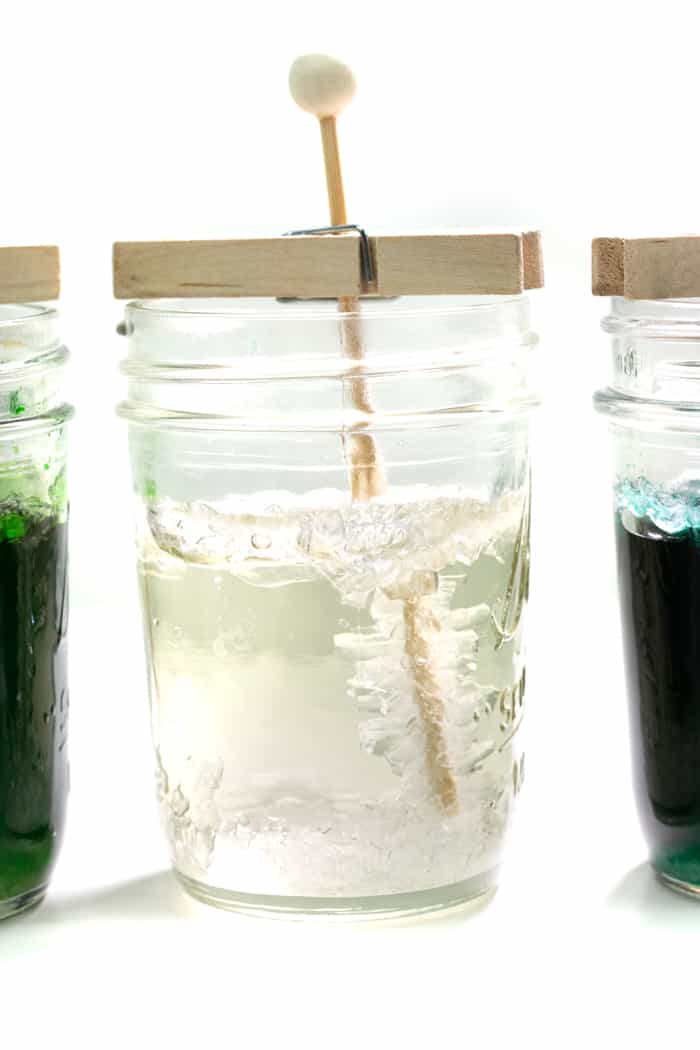
While the sugar-water mixture is cooking, prepare whatever materials you plan to use for the sugar crystals to attach to. Wooden swizzle sticks or a string works great.
The rock candy will need some sugar crystals to attach to, so run the sticks or string under some water to dampen it, then roll it in enough sugar to coat them heavily. Don’t be worried that you are using too much sugar, you likely aren’t!
Once coated, allow the stick or string to dry completely. When the sugar mixture is ready, decant it into glasses or jars. Then insert the sticks or string — attach sticks to clothespin and tie baker’s string to a pencil.
The crystallization process
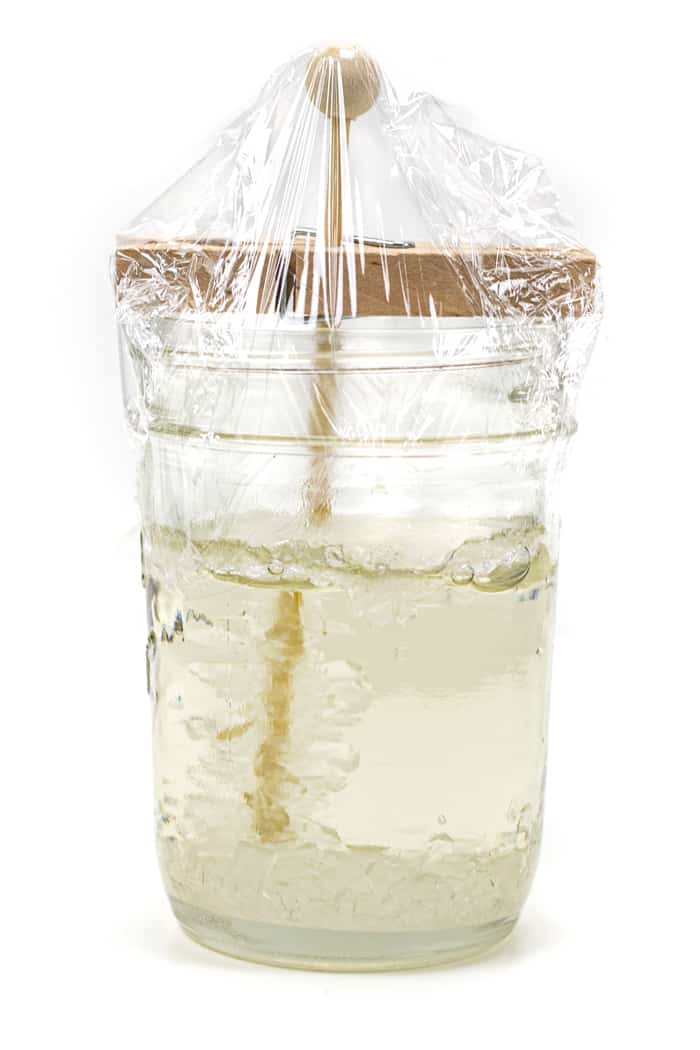
Cover with saran wrap to keep out bugs and dust. Then, set it aside and let the wait begin!
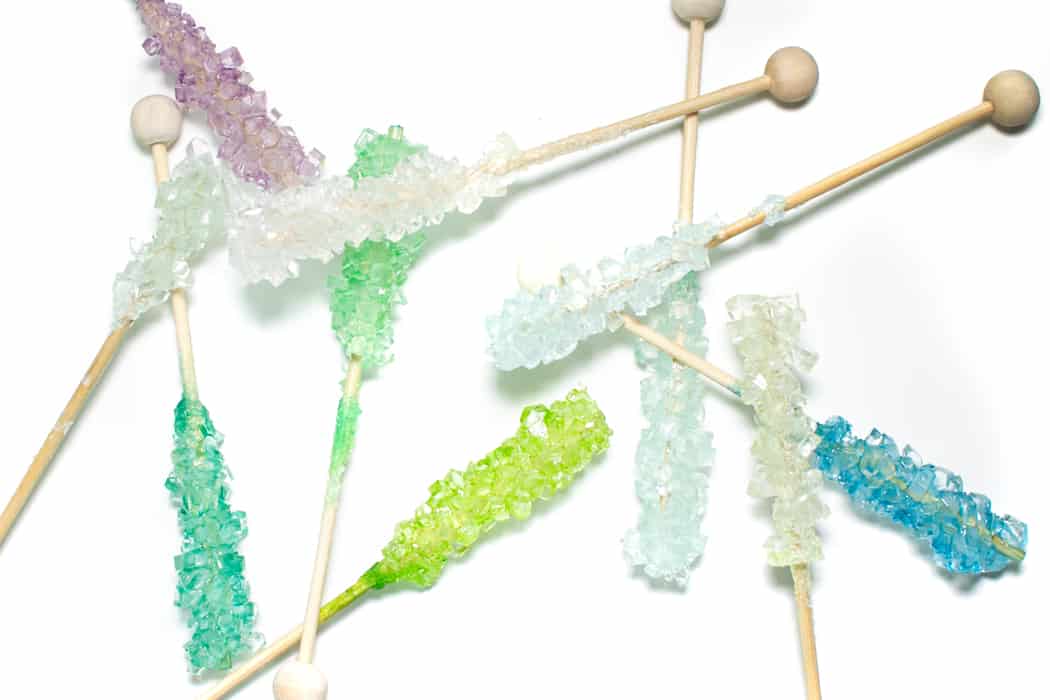
Rock candy crystals take a couple of weeks to fully form, but it is more than worth the wait.
I hope you love making this tasty hard candy and that it brings you tons of childlike joy as you watch it form! Once your fun treat is ready, enjoy however you would like!
Tips & tricks
Here are some tips and tricks for making this recipe:
- For a light, pastel color, 3-4 drops will do! For a bright, saturated color, do 6-8 drops or more. Keep in mind that pastel will be easier to watch as the rock candy crystals grow.
- Keep your rock candy mixture in a cool and dry place (room temperature) as you wait during the crystallization process. Try not to move it around too much and don’t bump it or knock it over.
- For extra sciencey fun, document the growth day by day with pictures and charts. Maybe even do a social media update so that everyone can be a part of the excitement! You can use this recipe for science fair projects during the school year too. I bet it’d win!

How to use rock candy
These sugar-coated sticks are the most fun way to sweeten a warm cup of coffee or tea. Bring out your inner child while drinking your morning cup of jo!
You can also crush up this pretty little candy and use it on top of cupcakes or cookies. Who needs sprinkles when you can use straight rock candy?
Enjoy this fun treat in a pink champagne cocktail or even as a garnish in strawberry rosé sangria. There’s even a cocktail called rock and rye whose purpose is to give rock candy the spotlight!
Of course, no one says you have to enjoy it in a civilized manner. Go to munchin’ on that stick of sugar and get your face all sticky like a kid! Who cares, it’s worth it.

FAQ
The main reason homemade rock candy doesn’t turn out is because there weren’t cups of sugar in the sugar mixture, or the sticks/string were not coated in enough sugar. Make sure you measure out everything exactly according to instructions. And don’t be afraid to coat those sticks and strings in tons of white sugar.
Never refrigerate rock candy! You may think that it would speed up the growth of those large sugar crystals, but it won’t. Keep the supersaturated solution at room temperature and just let science do its thing.
More candy recipes
- White Chocolate Bark: So much fun to make with colorful candies and sprinkles.
- Homemade Sprinkles: Skip the store-bought stuff and make your own sprinkles!
- Ginger Chews: These ginger candies are some of my favorites to snack on!
- Brown Sugar Caramels: Caramels are a delicious treat to add to candy gift boxes.
Leave a comment or tap the ★★★★★ below to leave a rating — it helps others and supports our work. We love hearing how it turned out!

Rock Candy
ingredients
- 2 cups water
- 4 cups granulated sugar plus 2 tablespoons
- 4-6 drops food coloring optional
instructions
- Heat water in a saucepan over medium heat. Add sugar one cup at a time, stirring after each addition until the sugar dissolved. Mixture will become thick. Remove from heat.
- Stir in food coloring now, if desired. Let cool for 10 minutes.
- Meanwhile prepare wooden swizzle sticks or string. Run through water and then coat thickly in sugar. Let dry completely.
- Pour sugar mixture into 6 (8-oz.) jars. Using clothespins (or a pencil for string) to suspend swizzle sticks 1 inch from the bottom of the jar. Be careful for the sticks/string to avoid the edges of the jar. Cover with saran wrap and set in a cool, dry place.
- Allow rock candy to rest and form for 2 weeks. Once it has grown to around 1-inch diameter, remove from the sugar syrup and let dry on a plate. Discard remaining sugar syrup and crystals.
notes
Save this recipe for later
recommended products
As an Amazon Associate and member of other affiliate programs, I earn from qualifying purchases.


Debi says
These are so cool. I love making them at home. Easy to do, but I hate waiting! LOL Thanks so much for all the fun!
Sabrina says
Hi Susannah.. I would love to try this recipe for an upcoming party. So I have a few questions.. 1. How many sticks can you put in one jar? I’m needing at least 50 rock candy sticks. 2. How long will they last after removing them from the jars? 3. How to store them until needed?
Thank you!!
Susannah says
Hey Sabrina! That is awesome that you want to try making so many. To answer your questions:
Hope this helps!