Count down to Christmas with a DIY Alcohol Advent Calendar! Filled with 25 mini liquor bottles, this project makes the perfect holiday gift for a friend who loves making cocktails. Learn how to make your own, with my printable label template!

Alcohol Advent Calendar DIY
I know it’s not even Thanksgiving yet, but I’m already counting down the days until Christmas.
I’m all for a good Christmas DIY project. Last year I made these pom-pom drink stirrers and candy cane drink flags.
I’ve also been known to make homemade liqueurs to give as gifts, like Irish cream, plum brandy or cinnamon whiskey. This year I’m adding homemade Cape Velvet Cream to my rotation.
Another favorite gift is this DIY advent calendar for alcohol. It’s a great one to make for anyone who loves to treat themself to a drink or would like to try new kinds of alcohol.

What is an alcohol advent calendar?
Advent calendars help people count down to Christmas with unique prizes that you open each day to help ease the wait.
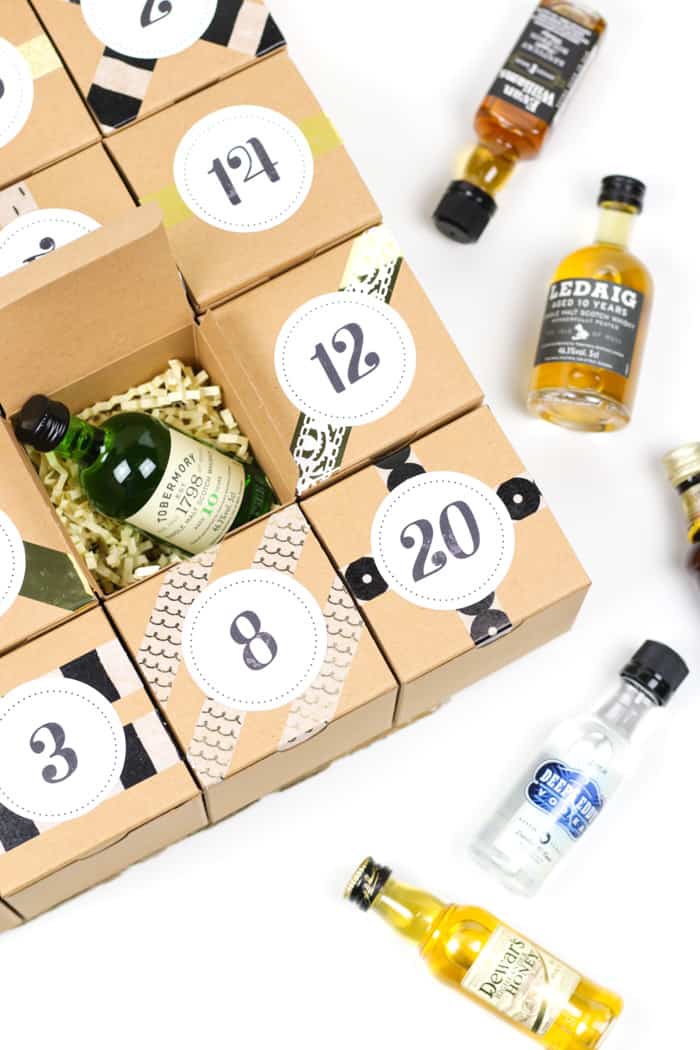
The idea behind this booze advent calendar * is that each day you open a box, and inside is a mini bottle of liquor.
You can drink it neat, on the rocks, or mixed into a cocktail. Save it for your homemade airplane cocktail kit if you like! (One of my favorite homemade gifts to give ever.)
This calendar makes a perfect gift for a friend who loves to mix her own drinks. It’s also totally fine to make it for yourself as I did!

Alcohol for an advent calendar
There are a few ways you could make this advent calendar:
A mixture of the main spirits: Choose from different brands of vodka, whiskey, gin, rum, tequila, brandy and liqueurs. This is a great way to try everything in my Holiday Spirits eBook.
All of one type of spirit: Bourbon lovers would love a bourbon advent calendar so they can try a new bourbon every day. You could also do a tequila advent calendar with different types of tequilas and mezcals. This is perfect for someone who has a favorite spirit but would like to try some new brands.
Liqueurs only: Look for the fun stuff that you can mix into coffee or sip on the rocks, such as Baileys, Rumchata and Kahlua.
Wine advent calendar *: If you’re a wine fanatic, this DIY can be for you, too. You would need to source mini bottles of wine, called piccolo, which are 187 mL. (I haven’t tested it myself, so let me know if you try it and how well the bottles fit!)
Beer advent calendar *: To fit cans of beer into this advent calendar, you’ll need to double the depth of the cavities. The set of boxes I use comes with 50 boxes, so you’ll want to nest them inside each other and secure with glue. Then you can fit cans inside!
All in all, it’s a really amazing way to try some new types of brands of spirits, wine and beer and related items that are fun and seasonal, or maybe just outside of your comfort zone.
You can reuse the calendar year after year with a new theme, or even fill it with other trinkets or toys.
Note: The bottle size matters, so I recommend shopping for your bottles first. The original DIY I made calls for 3x3x3-inch boxes, for which will need ~4-inch tall bottles. If your bottles are taller than that, you may need to make this DIY with 4x4x4-inch boxes. You could also decant bottles into these small, reusable 1.5-ounce mason jars instead and label them.
Other prize ideas
If you want to throw in a few items that aren’t booze, you can add some tiny bar tools or small bottles of bitters. Here are a few ideas:
- Keychain bottle openers — It never hurts to have one of these around! This is a set of 16, so you can save the rest for stocking stuffers.
- Small bottles of bitters — This set from Cocktail Punk is made in the USA and offers 6 kinds of bitters that can surprise you throughout the month of December.
- Wine stoppers or champagne stoppers — For the person who loves a glass of red, white or bubbly, these stoppers are high-quality.
- Whiskey stones — A bag of whiskey stones * is great for the person who loves to sip on their whiskey cold but doesn’t like the dilution of ice. These wine stones are similar but have a gentler look for a wine glass.
- Metal cocktail picks — These are great for garnishes like olives, and I love that they’re metal and reusable. These bamboo cocktail picks are compostable and fun for tiki lovers!
- Shot glasses * — Throwing in a pair of fun shot glasses * would be a great way to enjoy some of the new bottles in the advent calendar! I love these mason jar shot glasses for bourbon, these cactus shot glasses for tequila lovers and these Moscow mule mug shot glasses for mule lovers.
Any of these would be so fun for stocking stuffers, too!

Supplies
This alcohol advent calendar is an easy afternoon project, and I’m going to walk you through how I made it, so you can get in on this goodness too.
Scroll to the bottom of this post for a printable material list.
Materials
- 25 3x3x3-inch cardboard boxes
- washi tape
- crinkle paper filling
- 15×20-inch piece of sturdy cardboard (I used a piece of a large box)
- 1 15-inch piece of grosgrain ribbon
- 25 mini-bottles of liquor (50 mL, no more than 5 inches tall)
- 25 2-inch diameter circle labels (printable below!):
Important Note: If your bottles are taller than 4 inches, use 4x4x4-inch boxes instead of 3x3x3-inch ones. If using mini wine bottles or cans of beer, you will need to double the depth of the boxes by gluing two together.
Equipment
- hot glue gun
- replacement glue gun sticks
- scissors

How to make an alcohol advent calendar
Scroll to the bottom of this post for printable instructions.
First, plan out how you want your calendar to be. Do you want 24 boxes to take you to Christmas Eve? Do you want to do a 12 Days of Christmas booze calendar?
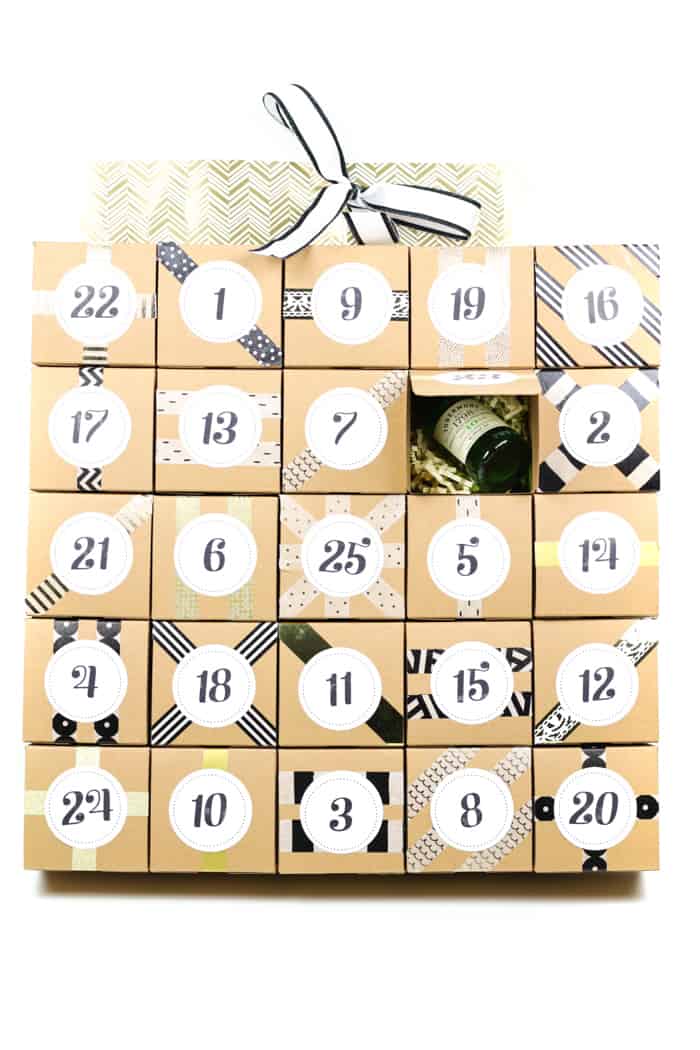
I chose 25, arranged in a 5×5 grid. If you choose 24, you can do a 4×6 grid. If you choose 12, do a 3×4 grid.
1. Assemble your cardboard boxes.
Make sure each crease is crisp and sturdy. (I forgot to get a picture of this!)
Arrange the boxes in five rows of five (or one of the other configurations mentioned above), and make sure each one is facing the same direction.
**If you’re making a beer advent calendar * or wine advent calendar *, then you will need deeper cavities. Double up on the boxes and nest them inside each other. Glue the lid of the bottom box to the inside walls of the top box. They will then be 3x3x6″, so your beer cans/wine bottles shouldn’t be taller than that.

2. Decorate each lid.
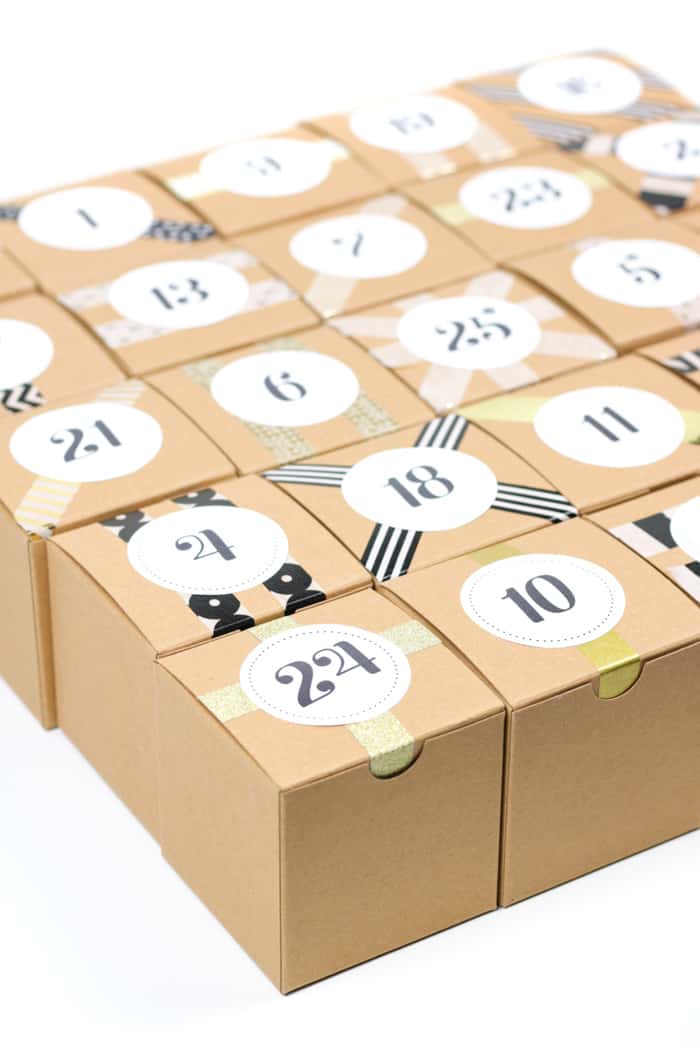
I decorated mine with washi tape in gold, black and white patterns, but you can totally get creative. I’d love to see how you make yours!

3. Label the boxes.
You have a choice of how you label each box:
- Count up: You can label them in numerical order from 1 to 25. The top row would be 1, 2, 3, 4, 5, the second row would be 6, 7, 8, 9, 10, and so forth.
- Count down: You can arrange them to count down from 25 to 1. The top row would be 25, 24, 23, 22, 21; the second row would be 20, 19, 18, 17, 16, and so on.)
- Go crazy! Lastly you can number them randomly like I did. You can use a tool like random.org to help you pick which box gets which number. (I kept #25 in the center on mine!)
I had some debates about this with friends. About half voted for “order, order, order” and the other half said that half the fun of an advent calendar is hunting for the right door! So, I leave this up to you.
Add the labels. Make your own or check out my printable labels:

4. Assemble the calendar.
Once you have the boxes how you’d like them, start gluing each box together. You’re going to create five rows of 5 boxes each.
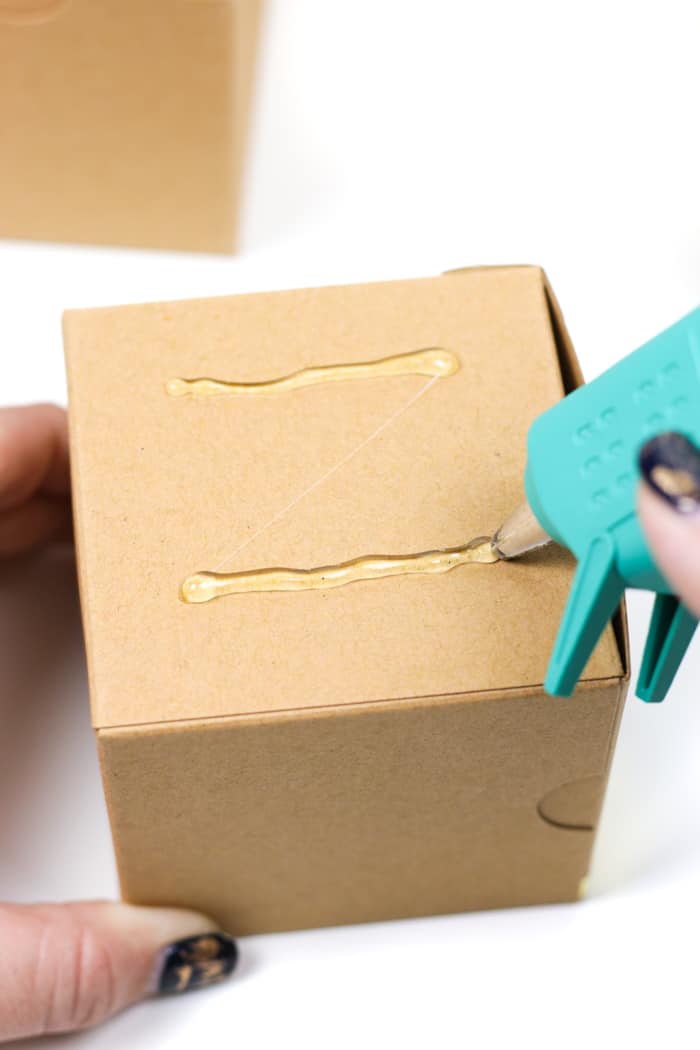
With the glue gun, draw two lines of the glue on the side of the box, then quickly adhere the box to the one next to it. Be careful to get the edges to match.
Allow the glue to cool & dry before moving onto the next.

Once you have all five rows glued together, glue the rows together. Draw two lines of hot glue all the way across the side of a row, then quickly adhere it to the adjacent row. Line each row up carefully so the edges match.
Allow the glue to cool/dry before moving onto the next row.

When your grid is complete, attach a piece of cardboard to the back with hot glue. This helps to make the calendar sturdy. (Remember, it is going to fit 25 mini bottles of booze!)
I also added a piece of decorative paper and a bow to mine! (I actually cut up an old file folder to use for the top piece. The holes at the center were perfectly sized for the grosgrain ribbon.) This is totally optional.

5. Fill ‘er up!
Then, fill it with booze! You’ll want to add crinkle paper or tissue paper for padding, which keeps the bottles from rolling around or breaking.
However, adding the paper padding can affect how well the bottles fit so you may need to place them at an angle.

6. Display it and enjoy!
Close up the boxes and you’re ready to display your booze advent calendar *! I do not recommend hanging it, especially since it will be heavy with all the bottles inside.

That’s it! Now you’re ready to enjoy your alcohol advent calendar or give it to someone who really deserves it. (You know you have a friend who would absolutely adore this!)
I hope you enjoy counting down to the holidays with a cocktail a day. I’ll be toasting you each day until Christmas!

Advent calendar countdown labels
If you wish to print out your own 2-inch diameter circle labels like mine, you can buy my template below. I used Avery 22807 2-inch diameter circle labels.
DIY Alcohol Advent Calendar
Materials
- 25 small cube cardboard boxes 3x3x3-inch
- 25 circle labels 2-inch diameter
- 3-4 washi tape in varying colors & patterns
- ½ lb. crinkle paper filling
- 1 piece sturdy cardboard 15×20-inch piece
- 15 inches grosgrain ribbon
- 25 mini-bottles liquor no more than 5 inches tall, or other small bar-themed trinkets like bottle stoppers or bar tools
Instructions
- Assemble the cardboard boxes. Make sure each crease is crisp and sturdy.
- Arrange the boxes in five rows of five boxes each, and make sure each one is facing the same direction.
- Decorate the lids with washi tape (or your preferred decorations).
- Top with lablels numbered 1 to 25. The labels can be arranged randomly, in order counting up from 1 to 25 or counting down from 25 to 1.
- Once you have the boxes how you’d like them, start gluing each box together to create five rows. With the glue gun, draw two lines of the glue on the side of the box, then quickly adhere the box to the one next to it. Be careful to get the edges to match. Allow the glue to cool & dry before moving onto the next box.
- Once you have all five rows glued together, glue the rows together. Draw two lines of hot glue all the way across the side of a row, then quickly adhere it to the adjacent row. Line each row up carefully so the edges match. Allow the glue to cool/dry before moving onto the next row.
- When your grid is complete, attach a piece of cardboard to the back with hot glue. This helps to make the calendar sturdy. (Remember, it is going to fit 25 mini bottles of booze!) Decorate the top of the box with ribbon, if desired.
- Fill each box with the crinkle paper for padding, then a mini-bottle of liqueur. Make sure the bottle is well-padded, especially if it is glass.
- Close up the boxes and you’re ready to display your booze advent calendar! Cheers!


LeAndra says
I just love this idea!
Susannah says
Thank you so much! It’s been so much fun.
Shinikia says
Where did you find the little boxes?
Susannah says
Hi Shinikia! I used these little boxes from Amazon (affiliate link). Hope this helps!
Caitlin says
I love this calendar and am looking to make one of my own! I can’t seem to find the PDF for the stickers though, could you repost the link so I can print the number labels? Thank you!
Susannah says
Hey Caitlin! So sorry you were having trouble with the link to the stickers. They are available right here. 🙂
Hailey says
This is such a cute idea, but I purchased the boxes you linked and they’re too small to fit any mini alcohols into 🙁
Susannah says
Hey Hailey! Oh dear — how big are your bottles? I have found they need to be just under 3-inches — some liquor brands have bigger bottles, but you have to get the smaller ones. They also need to be inserted into the boxes at an angle, or they won’t fit. I do have some bigger boxes linked in the post, too! I hope you are able to make it work!
Chris says
3x3x3 boxes are too small for 50ml airplane bottles. The images actually tell the whole story. Look at the pictures on this page! In no instance do you actually see any of the little bottles fitting in these boxes. Why? Because they won’t fit. Plain and simple.
The creator who took these pictures knew than not one of the bottles in the photos would fit in those boxes, yet they posted this idea anyway. What kind of person does that?
I’ve got 50 mini bottles here of various sizes and 50 3x3x3 boxes and not a single bottle will fit into one of these boxes. This idea is bunk.
If you’re going to try this, prepare to use 4x4x4 boxes and for the calendar to be TWENTY inches across both ways!
Susannah says
Hi Chris, Thanks for your super rude comment. I did in fact make this myself and I used bottles that fit in my boxes diagonally. I have used it for several years and can assure you I did find bottles that fit.
There ARE mini bottles out there that are 3-4 inches tall, which is the ideal height for the bottles. If you are using bottles that are taller, then yes, 4 sq. in. boxes would be best for this calendar.
Cindy says
Looking forward to having our annual Christmas craft day so we can make these adorable advent calendars. Do the boxes hold up after opening them? (so will last a few years). I think when you glue them together, shouldn’t you stay a little ways away from the edge of the box so that the little flap opening to open is easily accessible? Or would some cardboard between each layer work? Just thinking they might be difficult to open.
Susannah says
Hi Cindy! So excited for you to make one of these!
Yes, the boxes do hold up and are easy to re-close once you have opened them since the box flaps fit inside the boxes.
Your idea to not glue too close to the edges of the boxes is a good one, so you don’t accidentally glue any of them shut. I don’t think you need cardboard between though, because then the box edges won’t be flush.
I kept mine for a few years and it held up between Christmases, even in my hot attic! However, hot glue can lose its strength over time, so you may need to touch it up in a year or two.
Hope it goes well, Cindy!